Introduction: The Weighted Reality of What Actually Mattered
For a long time I was so tempted to look for magic in the shiny hardware. The amplifiers, the DACs, the turntables. Summarizing my studio and audiophile experiences, cureless GAS (Gear Acquisition Syndrome) I can tell you what really shapes your sound. Let me give you the brutal truth in my percentages, based on both measured reality, countless listening sessions, and pain from wasting money and time for chasing the wrong things to optimize.
Hierarchy of Sound Influence:
- Room acoustics: 50-70%
- Speaker quality and type: 15-25%
- Speaker positioning: 10-15%
- Room treatment: 5-10% (yes, separate from basic acoustics)
- DSP processing: 3-5%
- Source quality (digital/analog): 2-3%
- Amplification: 2-3%
- Preamplification: 1-2%
- Power conditioning: 0.5-1%
- Cables and connections: 0.1-0.5%
I’m neither trying to exaggerate nor blame industry selling offerings: understanding this hierarchy simply transforms how you approach system building. A well-set-up $3,500 system in a proper room will absolutely destroy a $50,000 system in an untreated concrete box. Every time.
Now, this is important: these percentages aren’t fixed. They interact. Poor speaker positioning can make great speakers sound terrible. Excellent DSP can partially compensate for room problems. But you can’t escape the fundamental truth – your room is the most important component in your system. Period.
Rooms can’t be shipped in boxes, and you can’t have a “Mark II” release of your living room next year. So that’s why the industry focuses on what it can actually deliver, although indeed year over year the improvements become more and more… marginal.
Room Geometry: physics doesn’t care about your budget.
Sound waves interact with room boundaries in predictable ways. When a wave hits a wall, it reflects. When that reflection meets the original wave, they either reinforce each other (constructive interference) or cancel each other out (destructive interference). This creates what we call room modes – frequencies that are either boosted or nulled based purely on your room’s dimensions.
Here’s where it gets interesting. Every room has three types of modes:
- Axial modes: Bouncing between two parallel surfaces (the strongest)
- Tangential modes: Involving four surfaces (weaker)
- Oblique modes: Touching all six surfaces (weakest)
The axial modes dominate your room’s bass response. What you want to avoid at all costs are dimensions that create overlapping modes. A perfectly cubic room is an acoustic nightmare. All three dimensions create the same modal frequencies, tripling their intensity.
That said, there’s no perfect ratio. The “golden ratios” you’ll read about – 1:1.6:2.6 and variations – they’re better than a cube, sure. But they’re not magic. I’ve heard spectacular sound in rooms that violate every ratio rule and terrible sound in “perfectly” proportioned spaces. The key here is your actual room has flexible boundaries, doors, windows, and stuff in it. These all change the effective acoustic dimensions.
Room volume matters more than ratios. Larger rooms have more evenly distributed modes. Below 85 cubic meters, you’re fighting physics every step of the way. The modes are sparse and pronounced. Above 170 cubic meters, modes start overlapping enough to create smoother response. It’s why mastering rooms are typically huge – not for ego, but for physics.
The Schroeder frequency is where your room transitions from modal behavior to statistical behavior. Below this frequency (typically 150-350 Hz in domestic rooms), individual modes dominate. Above it, there are so many modes that they blend together. This transition frequency is crucial because it determines your treatment strategy. Below Schroeder, you need thick bass trapping and careful positioning. Above it, traditional absorption and diffusion work well. Miss this distinction and you’ll waste money on treatments that can’t physically work at the frequencies where you have problems.
Non-rectangular rooms present their own challenges. Angled walls can help break up flutter echoes, but they create complex modal patterns that are harder to predict. Vaulted ceilings look impressive but create vertical modes that vary with position. That panoramic window is also a resonant cavity waiting to mess with your midrange.
One day I helped to cure acoustics on a listening room with a stunning 45-degree angled wall behind the listening position. My friend thought it would eliminate rear wall reflections. Instead, it created a complex interference pattern that destroyed center imaging. We ended up building a false wall to create a rectangular space. Sometimes the best acoustic solution is admitting defeat and starting over.
The bottom line is this: work with what you have, but understand the limitations. If you’re building from scratch, prioritize volume over ratios. If you’re stuck with existing geometry, measure first, theorize later. Real rooms behave differently than calculations predict.
Also remember, you can have a true high end experience even in the smallest possible cubic rooms: but with high end headphones route. Don’t let the room reality ruin your passion and pleasure. It’s not the only way to nirvana.
Room Treatment: Beyond the Foam Myth
Walk into any gear store and you’ll see it: walls of acoustic foam in various colors and patterns. “Studio foam” is nearly useless for real acoustic problems and is not used in any pro-grade studios. It’s the acoustic equivalent of putting a Band-Aid on a broken leg, with a big drawback: it accumulates bacteria, viruses, and spores like the best environment possible.
Real room treatment operates on three principles: absorption, diffusion, and bass trapping. Each serves a specific purpose, and understanding when to use which separates professional results from expensive disappointment.
Absorption removes energy from the room. Different materials absorb different frequencies. That 4 cm foam starts working around 1 kHz and up. Surprise: at home problems likely start at 200 Hz and down. You’re treating the wrong frequencies.
Effective absorption requires depth and density. The quarter-wavelength rule tells us that to absorb a frequency, you need material thickness equal to one-quarter of its wavelength. Want to absorb 100 Hz? That wavelength is 3.4 m, so you need nearly 90cm of depth with proper mass. See the problem?
This is where velocity vs. pressure comes in. Sound waves have two components: particle velocity (air moving back and forth) and pressure (compression/rarefaction). At boundaries, pressure is maximum and velocity is zero. A quarter-wavelength away, it’s the opposite.
Traditional porous absorbers (fiberglass, rockwool) work on velocity. That’s why spacing them off the wall improves low-frequency performance – you’re moving them into the velocity zone. But there’s a limit. Even 15 cm of 2kg density fiberglass with a 15 cm air gap only gets you meaningful absorption down to about 200 Hz.
For real bass control, you need pressure-based absorption. Membrane absorbers, Helmholtz resonators, and limp-mass systems work on different principles. They convert pressure fluctuations into mechanical motion, dissipating energy through internal damping. A properly designed membrane trap can achieve significant absorption at 50 Hz in just 15 cm of depth.
Here’s something most people don’t realize: corners are acoustic gold mines. All room modes have pressure maxima at boundaries, and corners are where three boundaries meet. A floor-to-ceiling corner trap addresses multiple modes simultaneously while taking up minimal floor space. It’s the highest-leverage treatment you can implement.
Diffusion is absorption’s sophisticated cousin. Instead of removing energy, it scatters it. This preserves liveliness while eliminating discrete reflections. But here’s the thing: effective diffusion requires specific mathematics and construction precision.
Quadratic Residue Diffusors (QRDs) use prime number sequences to create wells of varying depths. The depth variations cause phase shifts that scatter incident sound. A properly designed QRD can provide uniform scattering over several octaves. But those plastic “skyline” diffusors sold as “studio acoustic treatment” are decorative at best.
Real diffusion requires depth. A QRD designed to work down to 500 Hz needs wells nearly a foot deep. And it needs to be built precisely – errors in well depth destroy the mathematical relationships that create proper scattering. I’ve seen too many DIY attempts that look like diffusors but perform like bad reflectors.
The placement strategy matters as much as the treatment itself. First reflections – sound that bounces once before reaching your ears – arrive 5-20 milliseconds after the direct sound. Your brain tries to integrate them with the direct sound, causing comb filtering and destroying imaging.
The mirror trick still works: sit in your listening position and have someone move a mirror along the walls. Wherever you see the speakers, that’s a first reflection point. These need absorption, not diffusion. You want to eliminate these reflections, not scatter them.
Ceiling reflections are often ignored but equally destructive. That beautiful vaulted ceiling? It’s sending delayed reflections right into your listening position. Cloud absorbers (panels suspended from the ceiling) can work wonders. I’ve seen imaging snap into focus just from treating the ceiling first reflection points.
Rear wall treatment depends on distance. If you’re sitting close to the rear wall (less than 1.2 meters), use absorption to eliminate the strong, early reflection. Further away, diffusion works better, creating a sense of space without discrete echoes. The worst thing you can do is leave it untreated – that’s a recipe for comb filtering and confused imaging.
Here’s a practical treatment hierarchy for real rooms:
- Corner bass traps (all four vertical corners if possible). My strongest advice is a modern solution of an active bass trap like PSI C214, it finally delivers unquestionable, measurable value, removing the burden of custom trap design, manufacturing (and spouse trouble) for your room.
- First reflection points on side walls
- Ceiling reflection points above the listening position
- Rear wall treatment (absorption or diffusion based on distance)
- Front wall between speakers (often overlooked but important)
The goal isn’t a dead room because over-treatment sucks the life out of music engineered for not dead rooms on purpose. You want controlled reflections, not no reflections. Target RT60 (reverberation time) of 0.3-0.5 seconds for home listening. Studios aim for 0.2-0.3, but that’s for analytical listening, not enjoyment.
In the beginning of my journey I also fell in trap by covering every wall with foam, creating an oppressively dead space that fatigued my ears in minutes with real problems below 200hz not cured at all. Then I wondered why my system I paid so much attention to – sounded lifeless.
Speakers: The Transducers That Define Character
Speakers are where electrical signals become air movement, where signal becomes music. They’re the most colored, distorted, and personality-filled component in your chain. No speaker is neutral. Physics prevents it. Every driver has mass, compliance, and resonances. Every enclosure has its own colorations. Every crossover imposes its own phase relationships. The trick is finding one whose imperfections you enjoy.
Let’s start with the fundamental challenge: reproducing 20 Hz to 20 kHz with a single driver is essentially impossible. The wavelength at 20 Hz is 17 meters. At 20 kHz, it’s 1.7 cm. No single diaphragm can efficiently couple to air across that range while maintaining controlled directivity and low distortion.
So we use multiple drivers, each optimized for a specific range. But this creates the integration problem. At the crossover frequency, two drivers are reproducing the same signal. Their outputs combine, creating interference patterns that vary with listening position. Move your head a few inches and the tonal balance changes.
This is why time alignment matters. If the acoustic centers of your drivers aren’t aligned, their outputs arrive at different times. This creates phase issues that destroy imaging and coherence. First-order crossovers maintain phase relationships but require drivers to operate well outside their optimal range. Fourth-order Linkwitz-Riley filters allow steeper slopes but introduce group delay.
Coaxial drivers attempt to solve this by placing the tweeter at the acoustic center of the woofer. KEF’s Uni-Q, Tannoy’s Dual Concentric, ELAC’s Concentric – they all chase the ideal of a point source. But they introduce their own problems: diffraction from the tweeter mounting, intermodulation from shared magnetic structures, and the woofer cone acting as a horn for the tweeter.
The cabinet contributes as much to the sound as the drivers. Those thin walls are radiating surfaces, adding their own delayed version of the signal. Internal standing waves create resonances. Port turbulence adds noise. Even the baffle shape affects diffraction patterns.
Infinite baffle designs (sealed boxes) provide the most predictable low-frequency response and best transient behavior. But they require larger boxes for given bass extension and typically have lower sensitivity. That’s the trade-off – accuracy versus efficiency.
Bass reflex (ported) designs use Helmholtz resonance to extend bass response and increase efficiency. But the port output is delayed relative to the driver, creating group delay that can muddy transient response and proper high-pass filtering is crucial for ported speakers.
Transmission lines use internal pathways to absorb the rear wave, eliminating internal resonances. When done right, they provide extended, controlled bass. When done wrong, they’re expensive organ pipes. The complexity means few manufacturers pursue this approach seriously.
Horn loading offers the highest efficiency – up to 50% compared to typical dynamic speakers’ 1-2%. But horns impose their own colorations. The throat creates high-frequency resonances. The mouth determines low-frequency cutoff. And the directivity pattern narrows with frequency, creating the “beaming” that gives horns their reputation for aggressive sound.
Here’s what really matters in speaker selection:
- Dispersion characteristics determine how your speakers interact with your room. Wide dispersion creates a spacious sound but excites more room modes. Narrow dispersion reduces room interaction but shrinks the sweet spot. There’s no universal “best” – it depends on your room and preferences.
- Dynamic capability separates good speakers from great ones: maintaining composure during complex passages means a lot for pleasure. Compression effects kick in long before rated limits. When the voice coil heats up, resistance increases, reducing output. When the suspension reaches its limits, distortion skyrockets.
- Integration with your room trumps absolute performance. A speaker that measures perfectly in an anechoic chamber might sound terrible in your space. Those rear-firing ports need space to breathe. That wide baffle is going to interact with nearby boundaries. Those metal dome tweeters might excite every reflective surface in your untreated room.
This is why I recommend against choosing speakers based solely on your listening in the store, reviews or measurements. You need to understand how they’ll behave in your specific space. A speaker with controlled directivity and front-firing ports gives you placement flexibility. One that needs to be 1.8 meter from any wall limits your options.
Don’t prioritize one speaker brand over another for objective sound quality. Prioritize a local dealer who can arrange bringing the speakers to listen in your room versus ones who can’t – before you buy. An evaluate them not with test CDs, but with your music of taste. Because the system for Miles Davis will differ much from the system for Gojira.
The bottom line on speakers: they’re the most personal choice in your system, personal by design of your room and your own timbral preference. Unlike electronics, which can approach theoretical perfection, speakers involve fundamental compromises. Choose based on which compromises align with your priorities and room constraints.
Speaker Positioning: The Free Upgrade Nobody Uses
Speaker positioning can make a larger difference than upgrading to speakers costing twice as much. Every speaker position creates a unique interaction with your room’s modes and boundaries. Move a speaker one inch and you’ve changed its relationship with every room resonance. The trick is finding positions that minimize problems while maximizing strengths.
Let’s start with boundary interference. When your speaker sits near a wall, the direct sound and the reflected sound combine at your listening position. Depending on the path length difference, certain frequencies reinforce while others cancel. The closer to the wall, the higher the affected frequency. But here’s where it gets interesting: very close placement (under 30 cm) pushes the cancellation above the woofer’s range. And flush mounting eliminates it entirely. This is why soffit-mounted monitors in studios provide such clean bass – no rear wall interaction at all.
The Allison effect describes what happens with multiple boundaries. Your speaker has also some distance from side walls and the floor: each boundary creates its own interference pattern. When distances to different boundaries are similar, the cancellations stack up. Place a speaker 1m from the rear wall, 1m from the side wall, and 1m off the floor (on typical stands), and you’ve created a massive hole in your response around 94 Hz. No wonder people think they need subwoofers – they’ve positioned their full-range speakers to cancel their own bass output. The solution is deliberate asymmetry. Make the distances to each boundary different by at least a factor of 1.5. If you’re 60 cm from the rear wall, be at least 90 cm from the side wall and 120 cm from the floor. This spreads the cancellations across frequency, creating smaller dips rather than one huge hole.
Room modes add another layer of complexity. Placing your speakers at a modal peak will overdrive that frequency. At a null, you’ll get no output no matter how much power you pump in. The key is finding positions that excite modes evenly. The “rule of thirds” provides a starting point: divide your room length into thirds and place speakers at the first division. This avoids the worst modal positions. But it’s just a starting point. Real optimization requires measurement or careful listening.
Here’s my practical positioning procedure:
- Start wide and forward. Place speakers as far apart as your room allows while keeping them well away from side walls. Pull them into the room – at least 90 cm from the front wall if possible. This creates a rough triangle with your listening position.
- Set the initial angle. Point speakers straight ahead, not toed in. Listen to a vocal recording. The voice should appear as a strong center image exactly between the speakers. If it’s diffuse, move the speakers closer together. If it’s too narrow, spread them apart.
- Adjust distance to walls. Play a bass-heavy track with consistent low-frequency content. Move one speaker forward and back slowly, listening for bass evenness. You’ll hear peaks and nulls as you cross modal boundaries. Mark positions where bass sounds most even.
- Fine-tune toe-in. This affects imaging, soundstage width, and high-frequency balance. Start with speakers firing straight ahead. Gradually increase toe-in until the center image solidifies but before the soundstage collapses. The optimal angle depends on your speaker’s dispersion pattern and room acoustics.
- Verify with the flashlight trick. At your listening position, you should see the inside edge of each speaker cabinet but not the outside edge. This typically corresponds to 10-15 degrees of toe-in, but let your ears make the final decision.
- Lock it down. Once you find the magic positions, mark them with tape. Speakers get bumped, cleaning happens, life intrudes. You need to be able to return to optimal positions quickly.
- Don’t forget vertical positioning. Some speakers are designed for below-axis listening, others for on-axis. Know your speaker’s design intent. For on-axis, tweeters should be at ear height when you’re in your normal listening position. Being above or below the tweeter axis changes frequency response due to crossover lobbing.
The near-field alternative deserves mention. If your room is hopeless – concrete bunker, glass everywhere, spouse acceptance factor of zero for treatment – consider near-field positioning. Sit 90-120 cm from your speakers with them spread about 90cm apart. This maximizes direct sound while minimizing room contribution. I mix in near-field because it provides consistency. But for pleasure listening, I prefer a more spacious setup that lets the room contribute controlled ambience. It’s the difference between analytical accuracy and musical enjoyment.
Proper positioning ensures the direct sound arrives first, followed by lateral reflections, then rear reflections. Get this wrong and your brain can’t construct a proper soundstage. The difference between good and great positioning might be just decimeters. I’ve spent entire afternoons moving speakers in 20-cm increments, finding the spot where everything clicks. When you hit it, you’ll know – the soundstage opens up, bass becomes tuneful instead of boomy, and individual instruments occupy distinct spaces.
Is it obsessive? Maybe. But it’s also free. And I guarantee it will make a bigger improvement than the majority of amplifiers or DACs you’re contemplating for an upgrade.
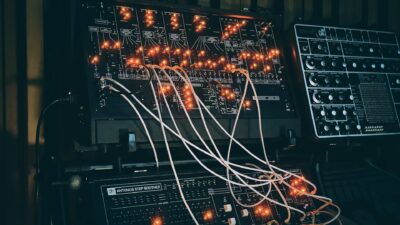
DSP Processing: The Digital Scalpel
Twenty years ago, suggesting DSP in a high-end system was heresy. “Pure” signal paths were sacred. Digital processing was the enemy. Today if you’re not using DSP intelligently, you’re leaving performance on the table. The key word is intelligently: DSP can fix problems or create new ones.
DSP does an interesting thing: it’s not actually correcting the room, but pre-distorting the signal to compensate for what the room does. The room still does what it does – you’re just feeding it a signal that, after the room mangles it, arrives at your ears somewhat closer to the intended response.
But physics imposes limits: you can’t EQ away a null. If two waves are canceling at your listening position, boosting that frequency just makes both waves bigger – they still cancel. You’re adding stress to your amplifier and speakers while achieving nothing. This is why understanding modal behavior matters before reaching for DSP.
Minimum phase versus excess phase is crucial here. Most acoustic problems below the Schroeder frequency are minimum phase – there’s a direct relationship between amplitude and phase response. These respond predictably to EQ. But excess phase problems, like reflections and resonances, don’t. EQ might fix the amplitude but worsen the time-domain behavior.
Modern room correction systems like Dirac Live, Trinnov, and Anthem Room Correction (ARC) go beyond simple EQ. They analyze impulse responses, identify problematic reflections, and apply both amplitude and phase correction. But they’re not magic and work best when fixing residual problems in already-decent setups.
Know what you’re optimizing for. Single-point measurements optimize for one spot but can make everywhere else worse. Multi-point measurements average across a zone but might compromise the sweet spot.
I learned this mixing electronic ambient music where spatial precision matters. A system optimized for a wide listening window sounds impressive for casual listening but loses the pinpoint imaging needed for critical work. Conversely, a system optimized for a single position sounds magnificent there but falls apart if you move your head.
Target curves are where science meets preference. A perfectly flat response sounds thin and bright in most rooms because we’re conditioned to hearing rolled-off highs from room absorption. The Harman target curve, based on extensive preference testing, shows most people prefer a gentle downward tilt from bass to treble. But here’s what the automated systems miss: different music benefits from different targets. Electronic music with synthesized bass might want ruler-flat response to 20 Hz. Acoustic jazz might sound more natural with a gentle low-frequency roll-off. Classical might benefit from a different high-frequency target than metal. One size doesn’t fit all.
Also, know your use cases before choosing a correction system: FIR versus IIR filters represent different philosophies. IIR (Infinite Impulse Response) filters are efficient and introduce minimal latency but can’t correct phase independently from amplitude. FIR (Finite Impulse Response) filters can correct amplitude and phase separately but require significant processing power and introduce latency. For stereo listening, latency under 20ms is generally unnoticeable. But if you’re also using the system for video or gaming, even 10ms can create lip-sync issues.
Here’s my approach to DSP:
- First, fix what you can physically. DSP works best as a scalpel, not a sledgehammer. Get your speaker positioning and basic room treatment right first. Then use DSP to address what remains.
- Measure, but don’t worship measurements. Your measurement microphone doesn’t hear like your ears do. Use measurements to identify problems, but let listening guide solutions. A 3dB peak at 150 Hz might measure badly but sound right with your speakers in your room.
- Start with broad corrections. Address major modal issues with gentle, broad filters. A 6dB cut with a Q of 0.5 is less audible than a 12dB cut with a Q of 10, even if the narrow filter measures better. Avoid corrections narrower than 1/3 octave unless addressing specific resonances.
- Leave the highs alone (mostly). Above 500 Hz, you’re fighting reflections more than room modes. Heavy high-frequency EQ just pre-emphasizes what will become reflections. If your highs need major correction, fix the physical problems first.
- Use time-domain analysis. Waterfall plots reveal resonances that frequency response measurements hide. A peak that decays quickly might be less problematic than a smaller peak that rings forever. Energy-time curves (ETC) show problematic reflections that EQ can’t fix.
- Consider multiple target curves. Create different presets for different music genres or listening levels. What sounds right at 85 dB might sound bass-heavy at 70 dB due to equal-loudness contours. Late-night listening might benefit from a bit of bass boost and treble cut.
- Don’t correct to perfection. A ruler-flat measured response rarely sounds natural. Music is mixed on imperfect monitors in imperfect rooms. Some deviation from flat is part of the sound. Aim for smooth, not perfect.
The elephant in the room with DSP is analog sources. Your vintage vinyl rig doesn’t want to be digitized, processed, and reconstructed. For analog purists, consider processors with analog bypass modes. Or accept that DSP benefits might outweigh theoretical analog purity. I’ve heard plenty of vinyl rigs that measure terribly but sound engaging – DSP would “fix” what isn’t broken.
Phase correction deserves special mention. Traditional EQ affects minimum phase – there’s a mathematical relationship between amplitude and phase. But acoustic problems often involve excess phase from reflections and resonances. Modern DSP can address both, creating impulse responses that look like textbook examples. But perfect impulse response doesn’t guarantee perfect sound. Use DSP as a tool, not a religion.
The future is adaptive processing. Systems that analyze the signal in real-time and adjust processing based on content. Heavy correction for problematic bass frequencies, minimal processing for delicate midrange. We’re not there yet for home audio, but it’s coming. Until then, use DSP wisely. It’s the most powerful tool in modern audio, capable of transforming marginal systems into exceptional ones. But it’s equally capable of destroying natural sound in pursuit of measurement perfection. Let your ears guide the process.
Amplification: The Misunderstood Middle Child
Amplifiers suffer from an identity crisis in modern audio. The objectivists claim they all sound the same if competently designed. The subjectivists hear night-and-day differences between every model. As usual, the truth lives in understanding where differences matter – and where they don’t.
Let’s start with the uncomfortable truth: in controlled blind testing, most competently designed amplifiers operating within their limits are indistinguishable. Peter Walker of Quad demonstrated this decades ago with his famous “straight wire with gain” philosophy. If an amplifier measures flat from 20-20k, has distortion below audibility, and sufficient current delivery, it’s done its job. So why do amplifiers sound different in real-world use? Because real-world use doesn’t match test conditions. We don’t listen to resistive loads – we listen to speakers. And speakers are anything but resistive.
Load dependency is where amplifier differences emerge. That “8-ohm” speaker rating? It’s fiction. Real speakers present complex impedances that vary with frequency. They might dip to 2 ohms at some frequencies while soaring to 30 ohms at others. Add in phase angles approaching ±60 degrees, and your amplifier faces a brutal challenge. This is where output impedance matters. An amplifier with high output impedance (like many tube designs) will show frequency response variations driving real speakers. The interaction between amplifier output impedance and speaker impedance creates a voltage divider that changes with frequency. This is why some amp/speaker combinations sing while others fight. Another factor of current capability (delivering current into difficult loads) separates adequate amplifiers from great ones.
The damping factor myth needs addressing. Once you include speaker cable resistance, damping factor drops precipitously. And research shows that damping factors above 50 provide no audible extra benefit with most speakers.
What about different amplifier topologies? Each has strengths and compromises:
Class A operates with output devices always conducting. This eliminates crossover distortion but generates tremendous heat and limits power. The smooth, liquid presentation many hear from Class A likely comes from the typical 2nd harmonic distortion profile and absence of crossover artifacts. But it’s inefficient – most energy becomes heat, not sound.
Class AB dominates for good reason. It offers reasonable efficiency, low distortion, and predictable behavior. The crossover region where devices hand off can create artifacts, but modern designs minimize this. Well-designed Class AB remains the pragmatic choice for most applications.
Class D has matured remarkably. Early switching amplifiers deserved their harsh reputation. But modern implementations rival or exceed traditional designs in every measurable parameter. The efficiency enables massive power in small packages. Some listeners still claim to hear “digital artifacts,” but controlled testing rarely supports this.
Here’s what actually matters when selecting amplification:
- Power needs depend on several factors: speaker sensitivity, listening distance, room size, and musical dynamics. The basic math: every 3dB increase in level requires double the power. A speaker with 87dB sensitivity needs four times the power of a 93dB sensitive speaker for equal volume. But headroom matters more than continuous power. Music is dynamic. A 50-watt amplifier with robust power supplies might outperform a 200-watt amplifier that compresses on peaks.
- Gain structure is critically overlooked. Modern sources output 2V or more. Many preamps add 10-20dB of gain. Power amplifiers typically have 26-32dB gain. Add it up and you’re often throwing away signal with the volume control, degrading signal-to-noise ratio. Optimal gain structure means operating volume controls in their best range – typically -20dB to 0dB. I configure systems to reach normal listening levels with volume controls around -10dB. This provides headroom for dynamic peaks while keeping the signal well above the noise floor. Too many systems have excess gain, forcing volume controls into their worst-performing regions.
Mono blocks versus stereo isn’t just prestige factor. Separate power supplies eliminate inter-channel crosstalk. Shorter speaker cables reduce losses. Independent ground paths minimize interference. But the improvements are subtle – maybe 2-3% better separation and dynamics. Whether that’s worth double the cost depends on your priorities.
Here’s my practical amplification hierarchy:
- Sufficient clean power for your speakers and room
- Stable operation into your speaker’s actual impedance
- Appropriate gain for your system structure
- Build quality for long-term reliability
- Topology based on your preferences and biases
Notice what’s not on the list? Exotic materials, cryogenic treatment, or directional fuses. Good engineering beats mysticism every time.
The tube versus solid-state debate deserves mention. Tubes typically exhibit higher output impedance, limited current delivery, and measurable distortion – primarily 2nd harmonic. Many find this pleasant, and you might also want to try it. It wasn’t something I liked for my music genres (electronic, metal, ambient), but tubes are a common choice for acoustic instrumental music, vocal jazz, blues, and classic rock. Solid-state offers lower distortion, higher damping, and consistent performance. Neither is inherently superior – they’re different tools for different goals.
My personal final destination amp model after years of experiments is Benchmark AHB2 – in my main listening room I have a pair for my floorstanding Sonus Faber Maxima Amator, and one for a computer setup with Harbeth P3ESR XD.
The bottom line on amplification: buy enough clean power to avoid compression, ensure compatibility with your speakers’ actual impedance, and stop obsessing. The differences between competent amplifiers pale compared to room acoustics and speaker positioning. A $1,000 amplifier in a treated room beats a $10,000 amplifier in acoustic chaos.
Sources: Where Quality Begins and Mythology Thrives
Digital Philosophy: Purity as a Default
In 2025 digital sources have reached a fascinating inflection point. The theoretical problems have been solved. Modern DACs achieve distortion and noise below the threshold of audibility. Jitter-timing errors in the digital clock have been reduced to insignificance in competent designs. Here’s what matters in digital: power supply isolation, analog output stage design, and mechanical construction – not the DAC chip itself. And current reality is well-implemented $500 DAC from 2025 often outperforms a 20-years old $10,000 one. Don’t spend much time on DACs choice, it’s commodity nowadays. Check out the ASR list, and get the one looking pretty enough at your table for your budget.
The digital format wars need defusing. CD-quality audio (16-bit/44.1kHz) has always exceeded human hearing capabilities when properly implemented. Higher sample rates and bit depths provide benefits in production – more headroom, better processing behavior – but offer no audible improvement in playback of -any- material. Longings for high sample rates in consumer audio (and belief in ability to sense magical 30khz or 50khz) doesn’t stand any comedy standard: most of us in the hobby struggle to hear even 15khz after being 30 years old due to unavoidable age-related hearing degradation. We can’t even comprehend redbook CD quality in other words. Any well-respected and competent person claiming to hear differences is likely hearing different masters, not format superiority.
DSD versus PCM represents philosophy more than quality. DSD uses single-bit samples at very high rates. PCM uses multi-bit samples at lower rates. Both can achieve transparency. Again, the audible differences people report usually come from different reconstruction filters, not the underlying format.
Network streaming has revolutionized source components. A competent streamer feeding a decent DAC provides access to millions of tracks in quality that would have been unimaginable twenty years ago. The convenience factor alone justifies the technology. But streaming isn’t without issues. Clock accuracy matters more in networked audio. When data packets arrive at irregular intervals, the receiving device must buffer and reclock. Poor implementation creates jitter. This is why some network streamers sound better than others despite carrying identical data: it’s timing precision. A properly configured computer rivals dedicated streamers. But “properly configured” means addressing electrical noise, optimizing software, and ensuring bit-perfect playback. It’s not plug-and-play, but the flexibility and cost savings appeal to many.
Here’s my digital component hierarchy:
- Competent DAC implementation (power supplies, analog stage, not just the chip)
- Appropriate reconstruction filters (sharp vs. slow roll-off affects sound)
- Clean power and isolation (digital noise is insidious)
- Interface quality (USB, AES/EBU, coax – galvanic isolation matters)
- Format support for your library
Analog Philosophy: Quality at Fingertips
Although vinyl is demonstrably inferior to digital in every measurable parameter: limited dynamic range, higher distortion, mechanical noise, channel separation issues – yet many of us (including myself) love it. Why? The answer involves psychoacoustics and ritual. Vinyl’s limitations often enhance enjoyment. The rolled-off highs sound “warm.” The compressed dynamics keep you engaged. The ritual of handling records creates mindful listening. There’s nothing wrong with preferring vinyl – just understand you’re choosing pleasant coloration over accuracy.
Turntable setup affects sound much more than most realize. Every parameter – tracking force, anti-skating, azimuth, VTA, cartridge alignment – changes the retrieval and distortion profile. A modest turntable perfectly set up outperforms an expensive one poorly adjusted. This is craftsmanship philosophy, not plug-and-play.
The phono stage contributes significantly to vinyl sound. RIAA equalization must be precise – errors here create tonal imbalances. But beyond accuracy, different topologies impart different characters. Tube phono stages often add that 2nd harmonic warmth. Solid-state offers lower noise and better extension. Choose based on what complements your system and preferences.
Here’s my analog source component hierarchy:
- Proper setup (geometry beats the price of components)
- Cartridge/arm compatibility (compliance matching prevents problems)
- Isolation from vibration (mechanical = audible)
- Quality phono stage (accurate RIAA, appropriate gain)
- Record condition (clean records sound better than expensive cartridges)
My approach to sources: prioritize convenience and library access. A streaming service providing millions of tracks in CD quality beats a handful of high-res downloads. Vinyl for the ritual and specific masterings unavailable digitally. Each serves different needs.
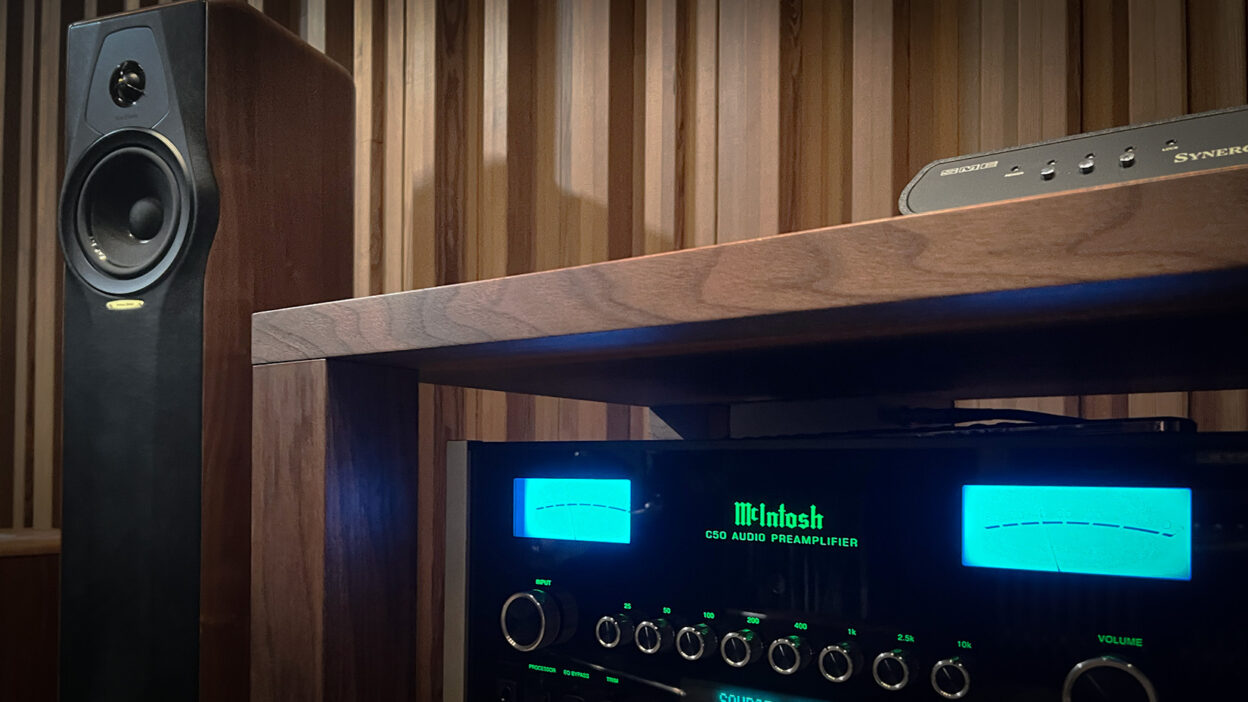
Preamplification: The Control Center Controversy
The preamplifier might be audio’s most controversial component. Let’s establish what preamps actually do: they provide gain (sometimes), impedance matching (always), source switching (usually), and volume control (essentially).
In the modern era of 2V sources and sensitive power amplifiers, the gain function often creates more problems than it solves. Gain structure optimization starts here. Many systems suffer from excess gain. Your CD player outputs 2V. Your preamp adds 20dB of gain (10x), creating 20V at maximum. Your power amplifier with 26dB gain needs only 2V for full output. Result? You’re using the volume control at -40dB, throwing away signal and operating in the control’s worst range.
This is why passive preamps deserve consideration. A quality stepped attenuator or transformer volume control adds no noise, no distortion, no coloration. But – and this is critical – passive preamps require careful system matching. Source output impedance must be low (under 1k ohm), power amplifier input impedance high (over 20k ohm), and cable runs short. I learned this lesson the hard way. My first high-end system used a passive preamp because “no gain = no distortion,” right? Wrong. The 10k ohm volume control formed a filter with cable capacitance, rolling off highs. Long cable runs to mono blocks exacerbated the issue. Switching to an active preamp with proper buffer stages transformed the system – not because it drove the cables properly.
Active preamps solve impedance matching but introduce their own complexities. Every gain stage adds noise and distortion. Power supplies become critical – any noise here gets amplified downstream. The volume control position affects circuit behavior. It’s a balancing act between technical performance and musical satisfaction.
The tube versus solid-state debate burns brightest in preamps. Tube preamps typically add 2nd harmonic distortion that many find pleasant – a subtle sweetening that enhances certain music. But they also have higher output impedance, potentially causing frequency response variations with long cables or low power amplifier input impedance.
Solid-state preamps offer lower distortion, better technical measurements, and consistent performance. But some find them clinical or sterile. This perception might be psychological – we expect tubes to sound “warm” and solid-state “cold.” But expectation affects perception, making both viewpoints valid for their holders.
Balanced versus single-ended operation matters less than marketing suggests. True balanced operation rejects common-mode noise and reduces ground loops. But it requires double the circuitry, potentially doubling noise and distortion. Many “balanced” preamps simply convert single-ended signals, negating benefits while adding complexity. Professional studios run balanced exclusively – but they have 30 meter cable runs in electrically hostile environments. Home systems with 1.5 meter runs in dedicated rooms? The benefits diminish. Use balanced connections if your components support them natively, but don’t obsess.
Here’s what really matters in preamp selection:
- Volume control quality tops the list. Cheap potentiometers create channel imbalance, especially at low levels. Stepped attenuators using precision resistors maintain balance but might have steps too large for fine adjustment. Relay-switched resistor networks offer the best of both – precision and flexibility – at higher cost.
- Input/output flexibility determines system growth. XLR and RCA inputs accommodate different sources. Multiple outputs enable bi-amping or subwoofer integration. Tape loops (remember those?) allow external processors. Home theater bypass integrates two-channel systems into multichannel setups.
- Impedance specifications ensure proper system matching. Low output impedance (under 100 ohms) drives any cable length or power amplifier. High input impedance (over 50k ohms) ensures sources aren’t loaded. These specs matter more than THD measurements in the fifth decimal place.
Modern preamps increasingly include digital sections. Built-in DACs eliminate a box and connection. Digital volume controls avoid analog potentiometer issues. Room correction DSP addresses acoustic problems. But complexity increases failure points – i faced too many software bugs among the majority of hi fi and hi end manufacturers. Shame.
Here’s my preamp priority list:
- System gain structure (avoid excess gain)
- Volume control quality (precision tracking)
- Impedance compatibility (proper buffering)
- Feature set for your needs (not theoretical needs)
- Build quality for reliability
Today’s world points toward integrated solutions. As digital sources dominate, the traditional preamp – analog switching and attenuation – becomes anachronistic. Digital volume controls in DACs, with proper analog output stages, can rival separates while eliminating connections and complexity. But the preamp serves another function: system heart. It’s where you interact most, where control happens, where the tactile experience lives. A beautifully made volume control, smooth source switching, responsive remote – these enhance enjoyment beyond measurements.
Power: The Foundation Everyone Ignores
Power conditioning might be audio’s most misunderstood category. The mythology surrounding AC power rivals cable debates for pseudo-science and exaggeration. Yet power quality genuinely affects performance – just not how most marketing suggests. Let’s start with reality: your audio system converts AC to DC internally. Every component has a power supply performing this conversion. The quality of this conversion – not mystical properties of the AC itself – determines performance. Understanding this relationship saves money and frustration.
Power supply design matters more than power conditioning. A well-designed linear supply with adequate filtering rejects most AC anomalies. Switching supplies, when properly implemented, can achieve even better noise rejection. The idea that you need a $5,000 power conditioner to “fix” AC is usually addressing the wrong problem.
That said, real power issues exist. Voltage fluctuations stress components and change bias points. High-frequency noise from switching devices, LED lights, and digital equipment can infiltrate poorly designed power supplies. Ground loops create hum and buzz. But understanding which problems actually affect your system prevents expensive solutions to non-existent problems.
My experience is dedicated circuits provide the biggest bang for buck. Running 12-gauge wire from your panel to dedicated outlets isolates your system from noisy household devices. Use 20-amp circuits even if you don’t need the current – the lower resistance improves dynamics. This $300 investment outperforms most boutique conditioners for thousands of dollars.
There’s also one thing that installers often miss: proper grounding. All audio circuits should reference the same ground point at the panel. Different path lengths create ground potential differences, causing current flow where it shouldn’t exist. This is basic electrical practice, not audio voodoo.
Surge protection is essential but often misunderstood. MOV-based suppressors sacrifice themselves protecting equipment. After absorbing surges, they degrade. That 10-year-old surge strip? It’s probably just a power strip now. Series-mode suppressors don’t degrade but cost more. Protect your investment properly.
The DC power supply trend deserves mention. Battery-powered components eliminate AC concerns entirely. But batteries have their own issues – voltage drops as they discharge, current limitations, maintenance requirements. The best battery supply might still underperform a well-designed AC supply.
Here’s my practical power hierarchy:
- Dedicated circuits with proper grounding
- Quality outlets with proper contact pressure
- Adequate wire gauge for current demands
- Power conditioning only if specific problems exist
What about power cables? Adequate gauge for current demands and proper termination. An ordinary hospital-grade cable achieves this for $40. Most systems need nothing more than dedicated circuits and quality outlets. If you have specific issues – voltage variations, measured noise, ground loops – address them with targeted solutions. But don’t assume problems exist because the common wisdom says they do.
Cabling and Connections: Where Reason Goes to Die
Poor cables with extreme parameters can affect sound. But competent cables – meaning proper gauge, reasonable construction, good terminations – are sonically indistinguishable.
At audio frequencies (20Hz-20kHz), cable behavior is dominated by basic electrical parameters – resistance, capacitance, and inductance. The wavelengths involved (miles long) mean transmission line effects that matter at radio frequencies simply don’t apply. Yet cable companies invoke quantum mechanics, cryogenics, and metallurgy that would make a physicist weep.
Speaker cables need to handle current without significant loss. The math is simple: resistance equals voltage drop equals power loss. For an 8-ohm speaker, keeping cable resistance under 0.1 ohms (1.25% of load) ensures negligible loss. That’s 12-gauge wire for 7.5-meter runs. Done. But what about skin effect? At 20kHz in copper, skin depth is about 0.5mm. A 12-gauge wire has a radius of 1mm. So yes, current crowds toward the surface at high frequencies. The effect? About 3% increase in resistance at 20kHz. In electrical terms: nothing. Capacitance and inductance matter more but still minimally. Standard twisted-pair or coaxial construction keeps these parameters reasonable.
Interconnects carry smaller signals, making shielding more important than current capacity. Capacitance becomes the dominant concern – high capacitance with high source impedance creates a filter. But any competent cable keeps capacitance low enough to push this filter well beyond audibility. The balanced versus single-ended debate has clear answers. Balanced connections reject interference through common-mode rejection. If your equipment supports true balanced operation (not just XLR connectors), use it. The benefits are measurable and audible (however, just in difficult environments).
Digital cables expose the absurdity most clearly. Digital transmission either works or fails catastrophically. If bits arrive intact, the cable has succeeded. Timing precision (jitter) matters for synchronous interfaces, but any certified cable achieves required specifications. That $1,000 USB cable carries identical data to a $20 certified cable.
The directionality myth deserves special contempt. Wire has no inherent direction for AC signals. Directional arrows on cables indicate shield grounding, not signal flow. Any claimed sonic differences from cable direction fail under controlled testing.
So why do people hear differences? Expectation bias is powerful. If you spend $5,000 on cables, believing they transform your system, your brain obliges. This isn’t weakness – it’s human perception, and you may exploit it for the benefit of your pleasure. The same mechanism makes wine taste better from expensive bottles.
Level matching exposes another variable. Different cables have different resistance. Tiny level differences (0.2dB) are perceived as quality differences. The louder cable sounds “more dynamic” or “more detailed.” Control for level and differences vanish.
Here’s my cable recommendation:
For speakers:
- Use adequate gauge for length (12AWG for most applications)
- Ensure good terminations (bare wire or quality connectors)
- Keep runs as short as practical
- Spend $15 per meter, not $200
For interconnects:
- Use shielded cable in noisy environments
- Match impedances properly
- Keep capacitance reasonable
- Professional cable most decent studios use (Mogami, Canare) are widely available, cost fraction of audiophile ones, and work perfectly
For digital:
- Use certified cables meeting interface specifications
- Keep runs within spec limits
- Don’t believe timing or jitter claims for packet-based protocols
- $20-50 achieves everything possible
Simple wisdom here is the connection quality matters more than cable exotica. Oxidized connectors, loose connections, or poor contact pressure degrade signal more than cable differences. Clean connections periodically. Use contact enhancers if you like (though their benefits are marginal). Ensure positive mechanical connection. Remember: cables don’t require elevation from floors – the capacitance to ground is negligible at audio frequencies. Burn-in doesn’t change wire properties.
My advice: buy professional cable from pro audio suppliers. It’s built to survive roadies, not impress audiophiles. It measures well, lasts forever, and costs appropriately. Spend the savings on music or room treatment – investments that actually improve your experience.
Conclusion: The Integrated Perspective
Building exceptional home audio is about understanding how everything interacts as a system. The professional audio world learned this lesson long ago. We don’t chase the last 0.001% of distortion improvement because we understand the hierarchy of what matters. A great mix on average monitors in a great room beats a poor mix on perfect monitors in a terrible room. Every time.
Here’s the path I recommend:
- Start with honest assessment. What’s your room really like? What music do you love? How do you listen? Build for your reality, not some theoretical ideal. The system built for Carbon Based Lifeforms will differ from the system for Eric Clapton. The system built for Dimmu Borgir will be much closer to the system suitable for Tchaikovsky, than for Pink Floyd or Eminem. Analyze your music taste – it will lead you to different systems.
- Establish your foundation. Room acoustics and speaker selection. Get these right and everything else falls into place. Get them wrong and nothing saves you.
- Position obsessively. Use measurement tools, but trust your ears. When you find the magic spot, lock it down. This costs nothing but time.
- Add treatment strategically. Measure, treat, measure again. Address real problems, not theoretical ones. Stop when it sounds right, not when it measures perfectly.
- Choose electronics pragmatically. Sufficient power, appropriate features, reliable operation. The best amplifier is the one you forget about because it just works.
- Optimize signal flow. Proper gain structure, quality connections, appropriate cables. Nothing exotic, just competent engineering.
- Then stop. The hardest part. When your system makes you want to listen to music instead of equipment, you’ve succeeded. Resist the upgrade urge. Enjoy what you’ve built.
Because, your next huge step, which unlocks the next level of sound pleasure is your brain. In Part II. I will dive into audioscience and professional audio observations which widely lead us, audiophiles, to the ultimate sound experience.